

Good luck beating the levels of Mushroom Kingdom when Thwomps are around. Their goal is to crush, so don’t find yourself underneath one. For my son’s Super Mario birthday, we turned our hallway into a Thwomp tunnel. Read on to find out how to make these giant stone faces yourself..
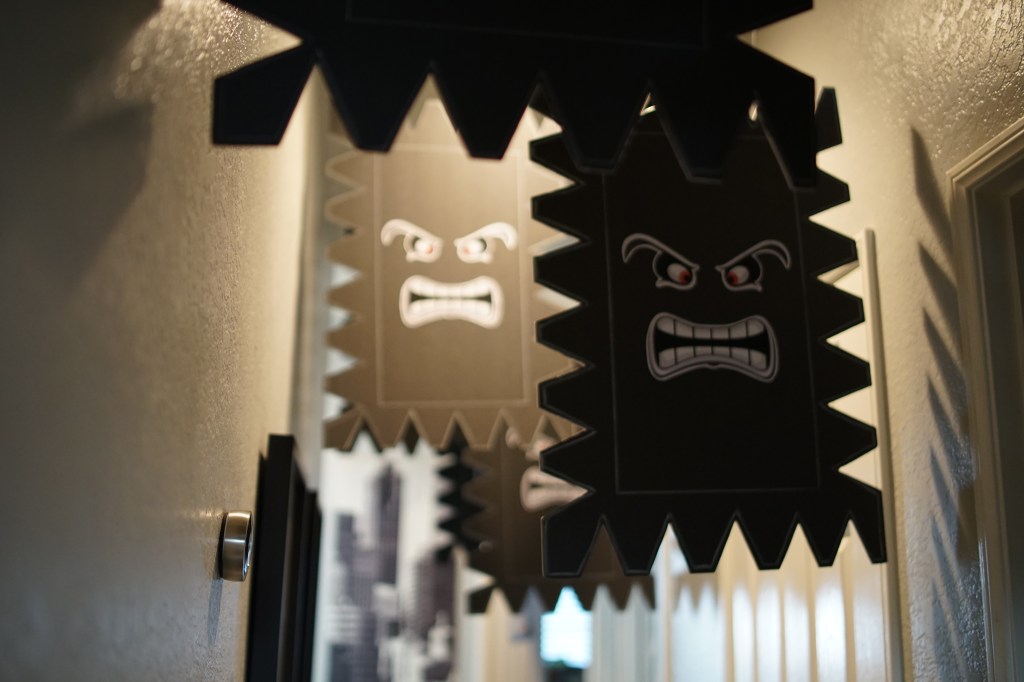
Enter if you dare!

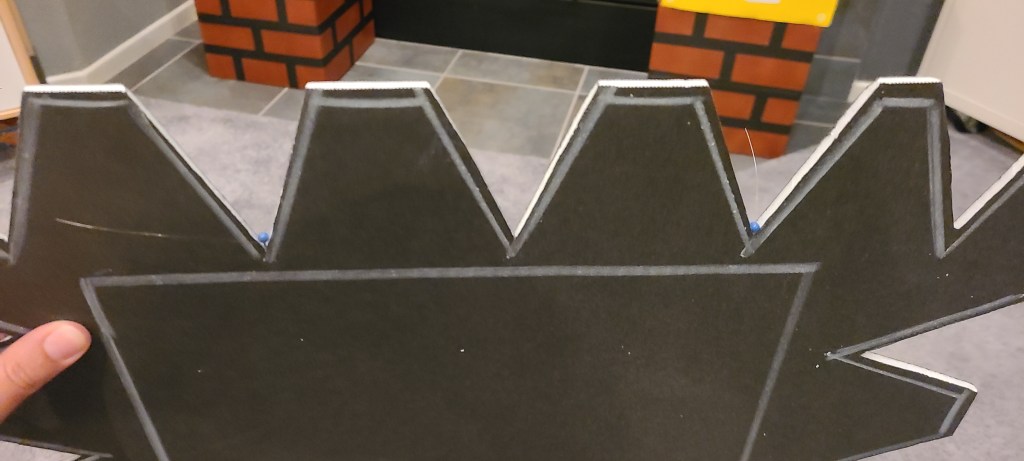
I bought 8 pieces of black foam board from Dollar Tree for this project

I started by making a 2.5 x 3″ triangle out of thick paper that I used to trace triangles around the whole board. I left a one inch gap in between each triangle I traced

I used this electric scissors tool (aka electric box cutter) to cut out the triangles I traced. This tool made this project so much easier

One side down, three more to go

I traced around the edge of the Thwomp with white crayon using a ruler and made a rectangle in the center. Finally, I cut and glued a Thwomp face I found on Google images

To hang the Thwomps, I tied fishing wire to top of a ball tip needle and pushed the needle into the top of the foam board
I did this on either side on the top of the Thwomp and used clear moving tape to hang them from the hallway ceiling. I hung each Thwomp at a different height to give a falling effect (Tip: hanging the Thwomps is a two person job)

There you go, a Thwomp tunnel only the bravest Mario characters would enter. Good luck!

Leave a comment