It has become a tradition of ours to make Christmas gifts for the whole family every year. My kids LOVE making presents for everyone and passing them out on Christmas. If you’re ready to get crafty, put on your favorite Christmas playlist, top your hot cocoa with some marshmallows, and keep reading. Here are our top three Christmas crafts thus far..
Photo Ornaments
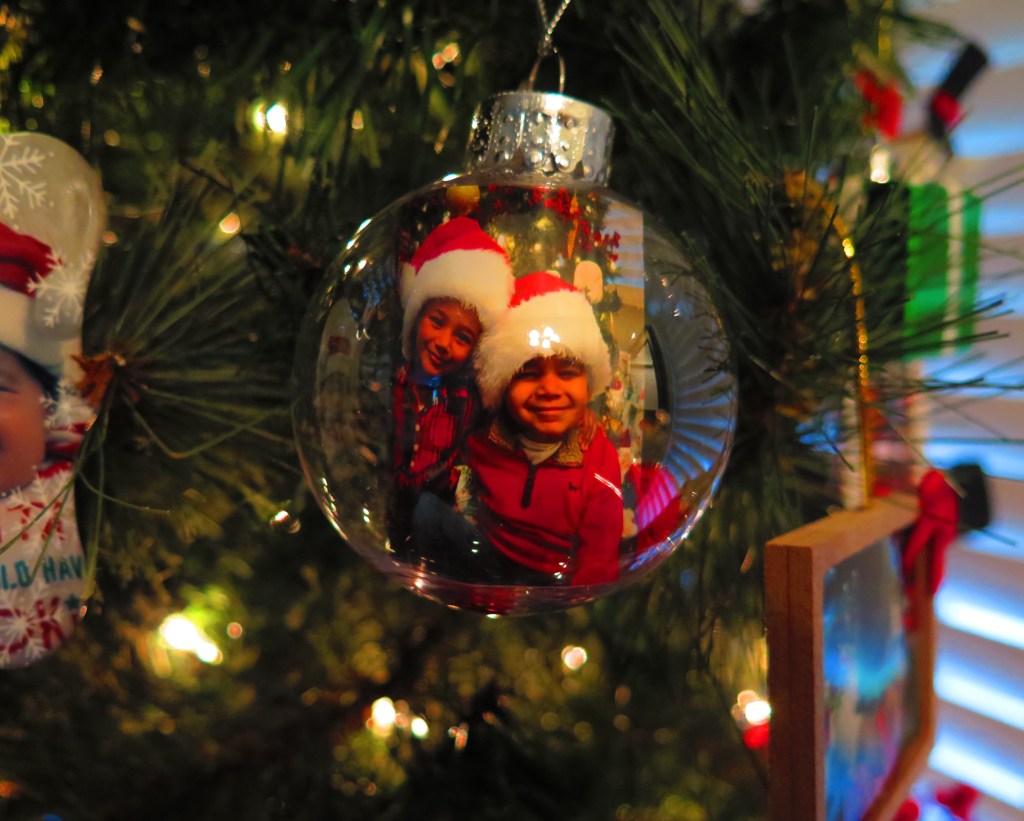
Love this craft, fun and easy with a personal touch. I found all the items for this project at Dollar three, including these clear plastic ornaments
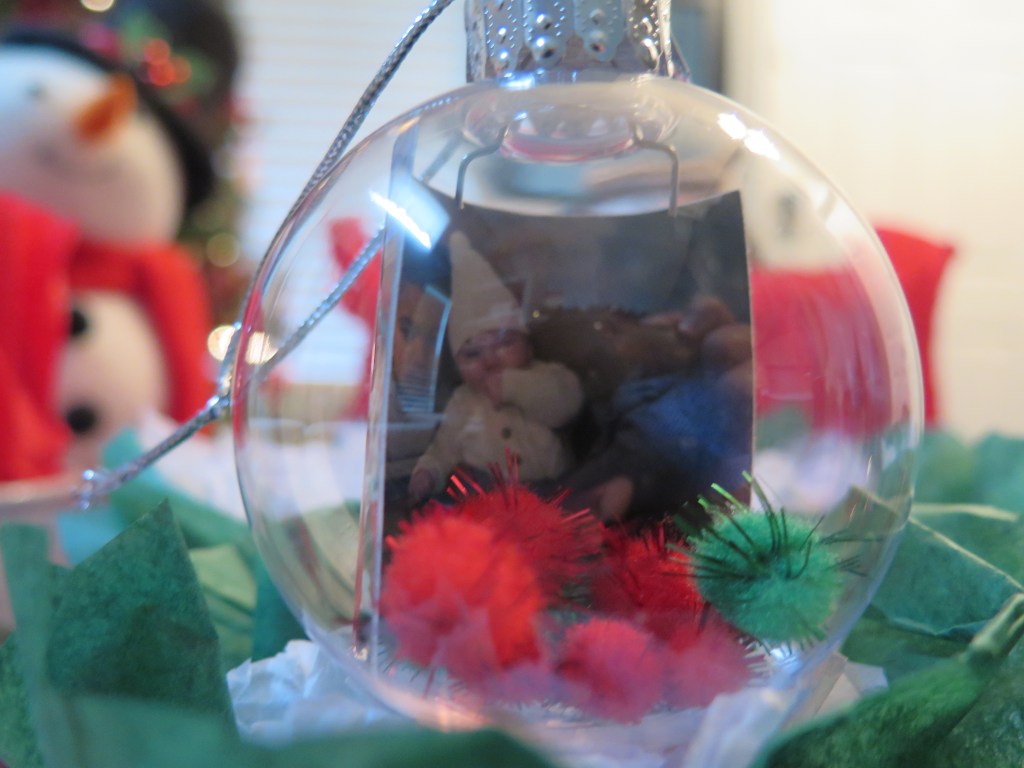
My kids were in charge of opening each ornament and adding a few shiny pom-poms to the bottom of each one
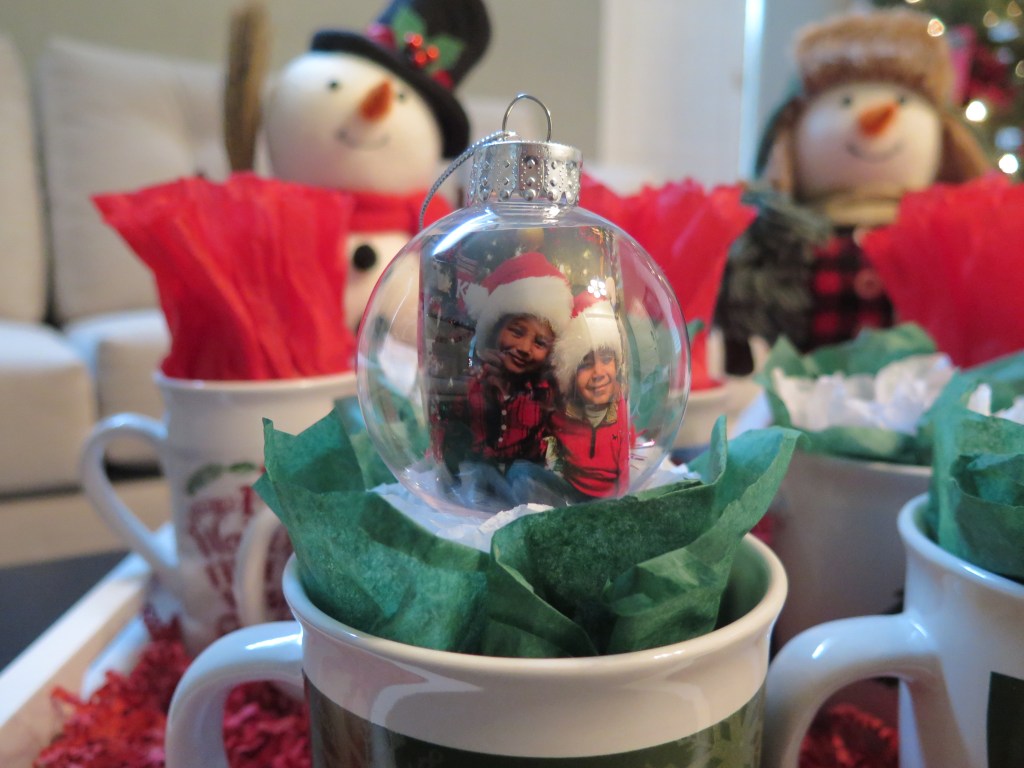
I ordered two sets of wallet sized photos and glued them back to back. I carefully rolled the photo up so it could fit through the ornament opening. My kids placed the photos inside each one and put the ornament tops back on. Tip: Use a sharpie to write the year on the ornament or on the photo itself so you remember when this gift was made
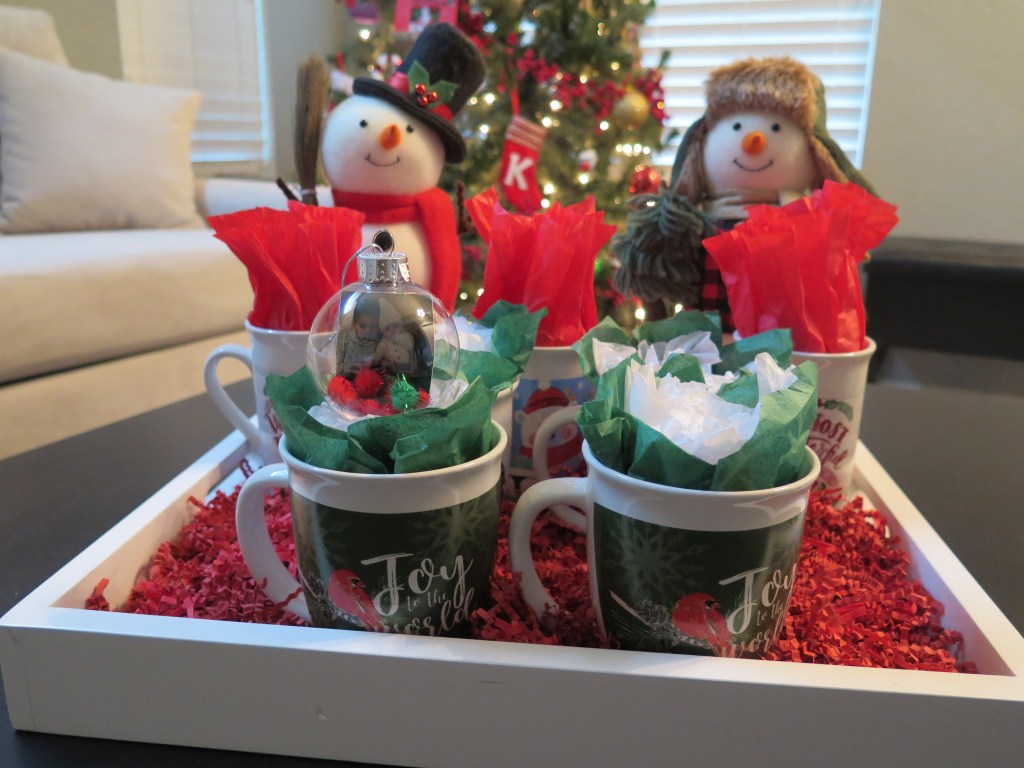
We wrapped the ornaments up in tissue paper and put them in these festive mugs
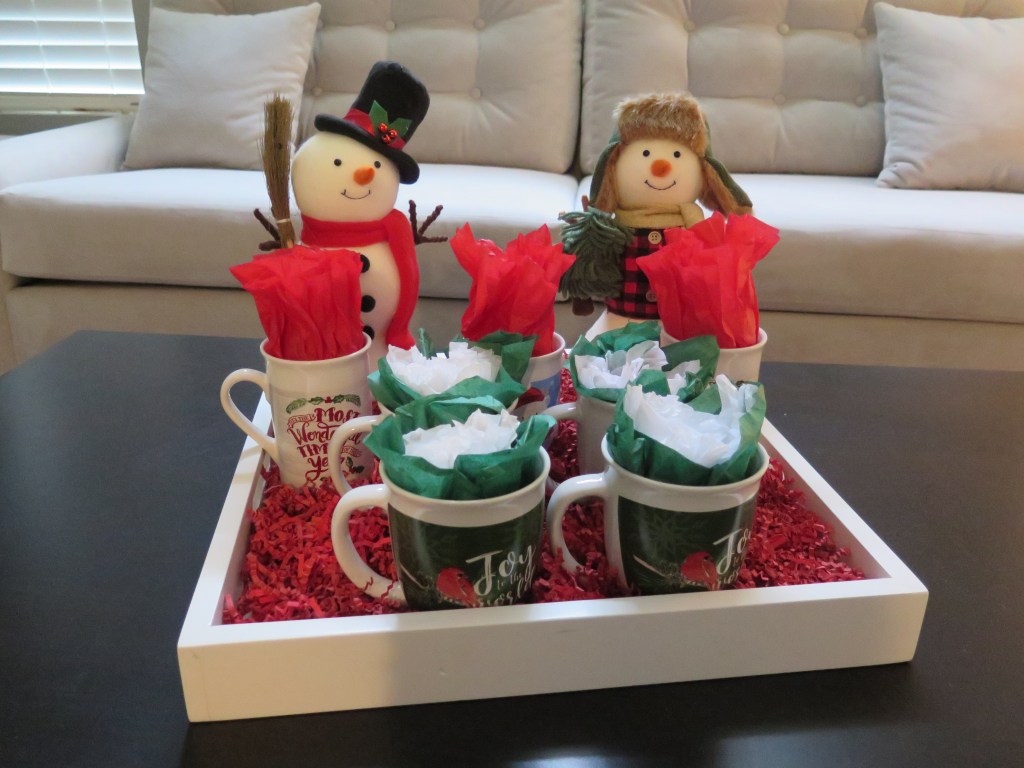
A cute and simple Christmas craft that doesn’t take all day to make
Light-Up Snowman Picture Frames
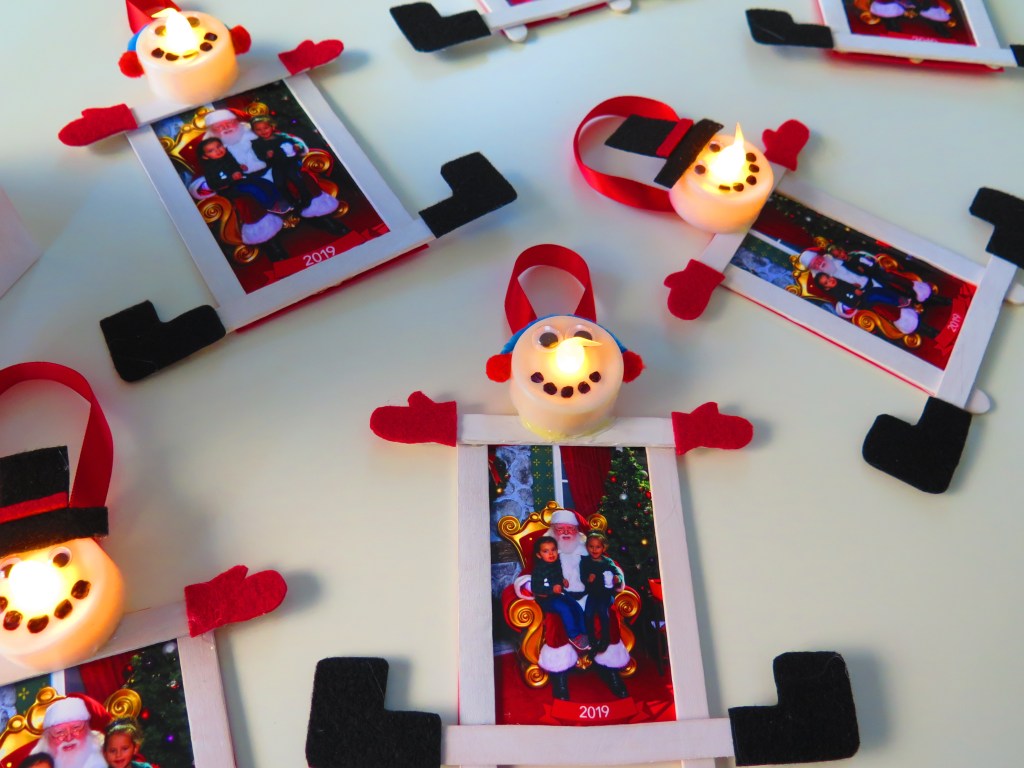
Now this project, on the other hand, might take a good portion of your day to make. As long as you can carve out some time, this one is worth it. The kids started this project by painting popsicle sticks with white paint (four sticks per frame). While they were painting, I cut out felt paper for red mittens, black boots, black top hats, and thin red stripes for the hats
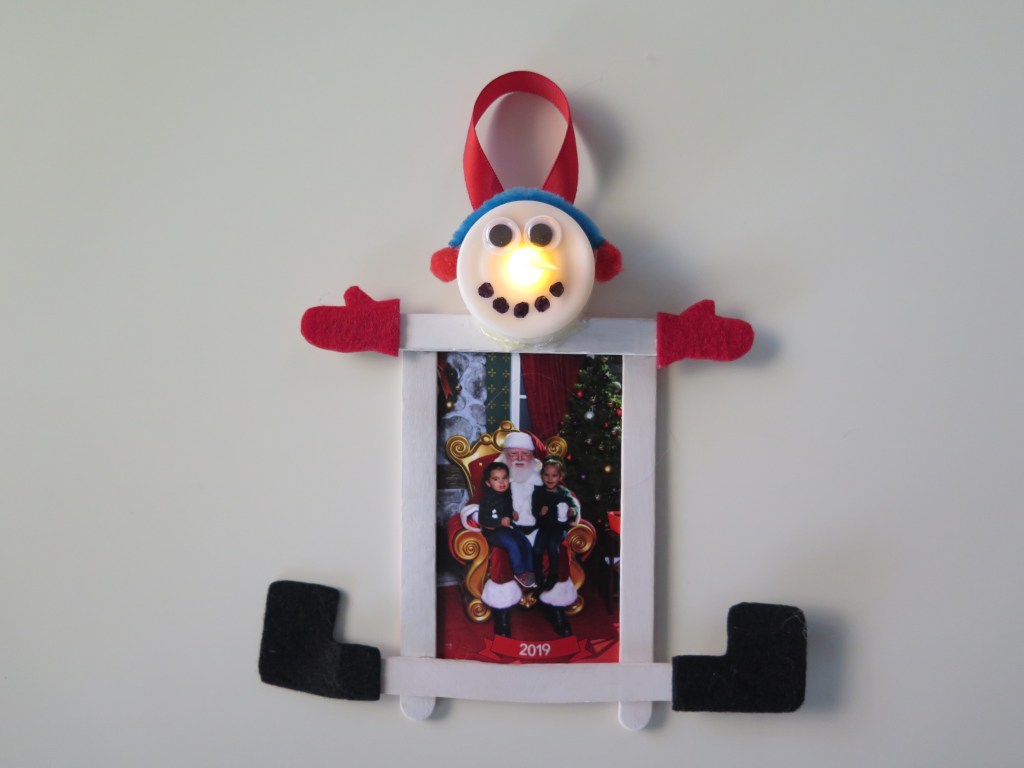
I used blue chenille stems for ear muff bands and red looped ribbon for hanging. I measured the length for both and my kids cut them out. I used tiny pom-poms for the ear muffs
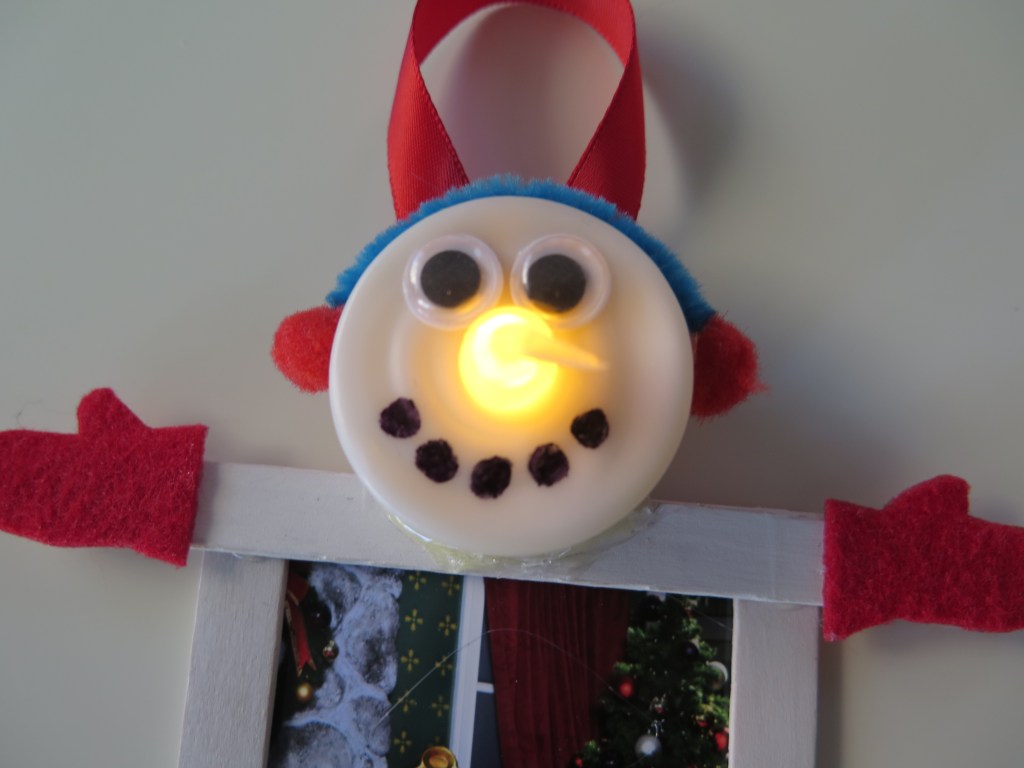
I made five dots under the snowman’s nose with black sharpie marker. Important Tip: make sure the on/off switch on the back of the tea light is at the TOP before gluing the googly eyes and drawing on the mouth because the BOTTOM portion of the tea light is going to be glued onto the frame 😉
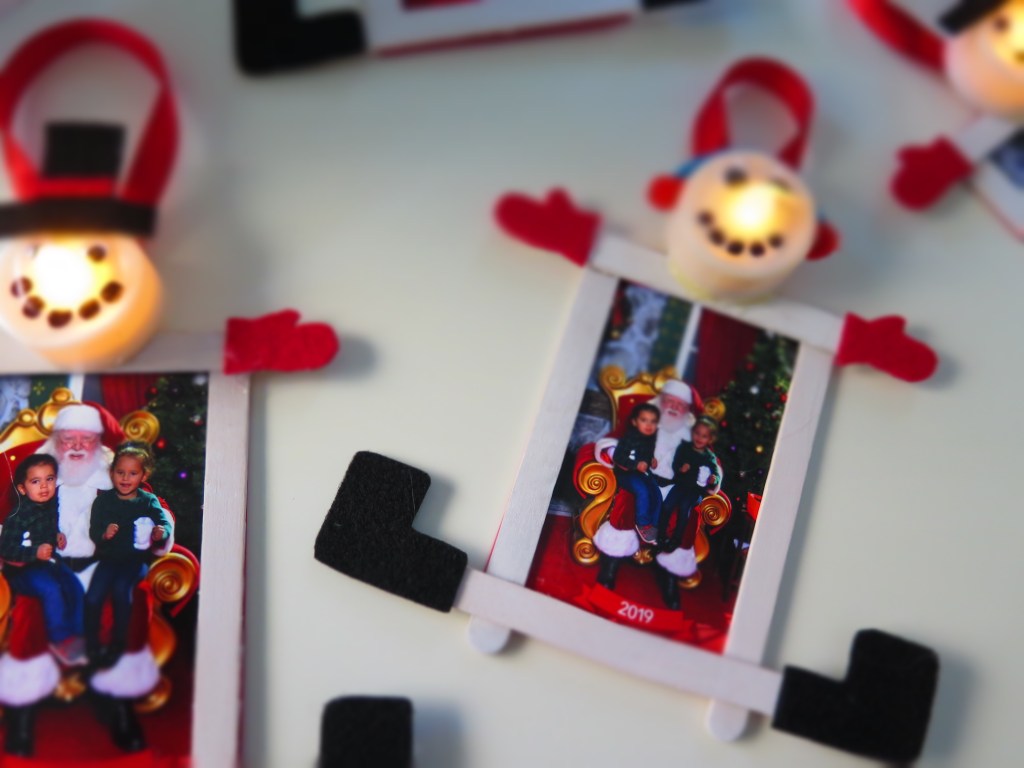
I cut out red construction paper to glue onto the back of the photos. My kids wrote their names and the year on each one. While they were busy doing that, I hot glued everything onto the tea lights, then hot glued the tea lights onto the frames
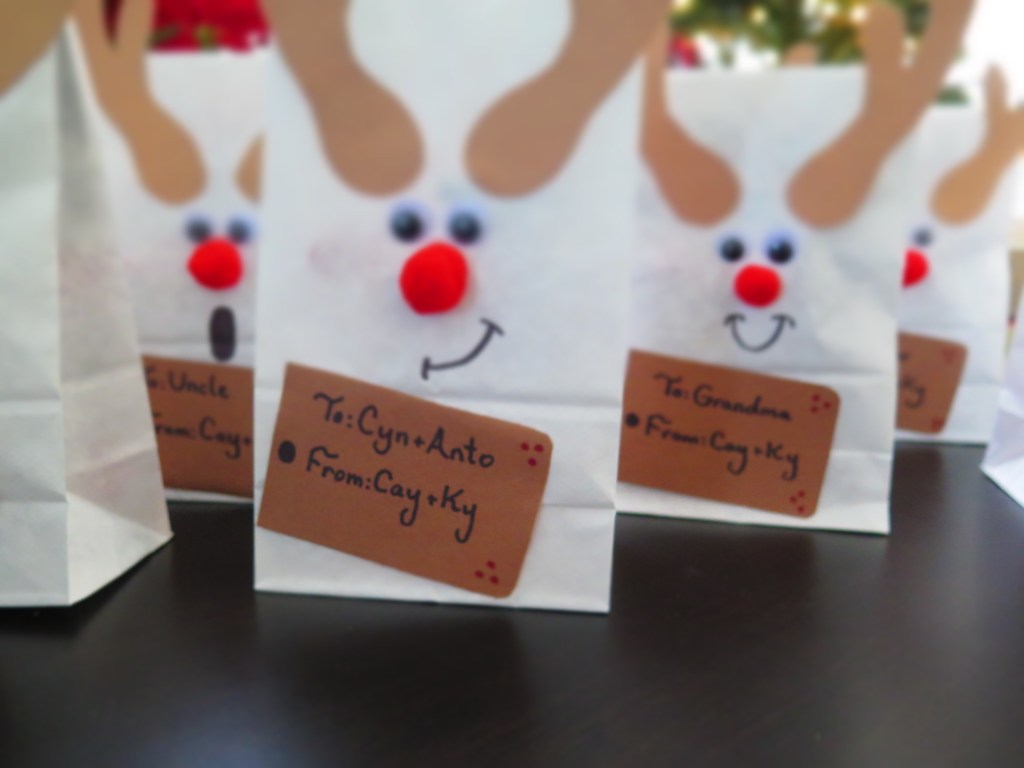
We packaged them in these white paper bags we decorated as reindeer
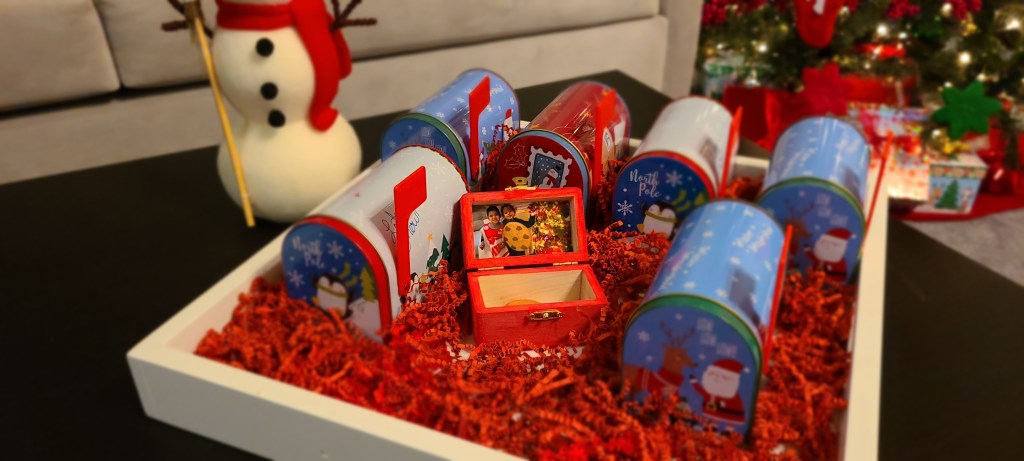
Keepsake Boxes
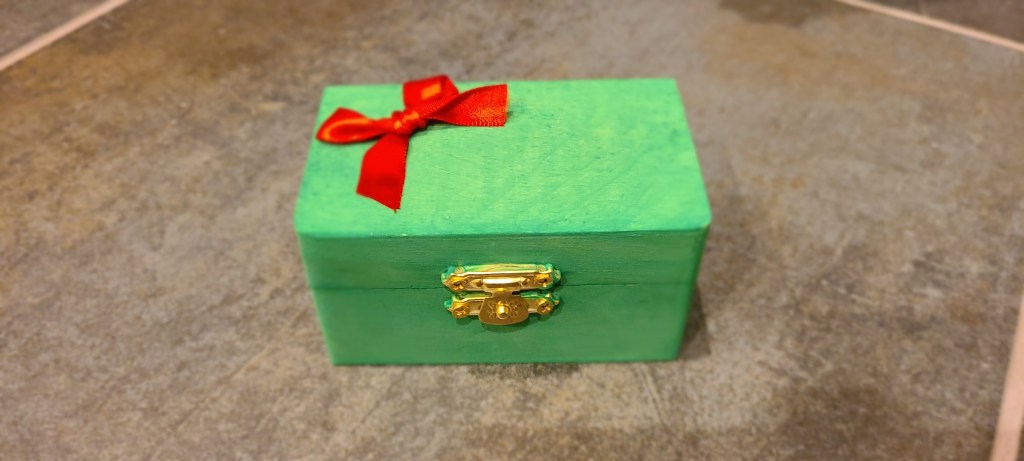
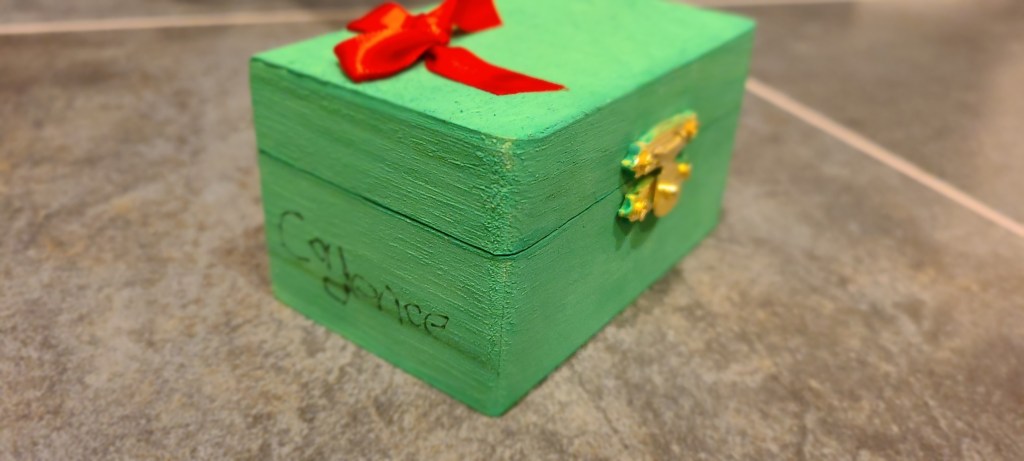
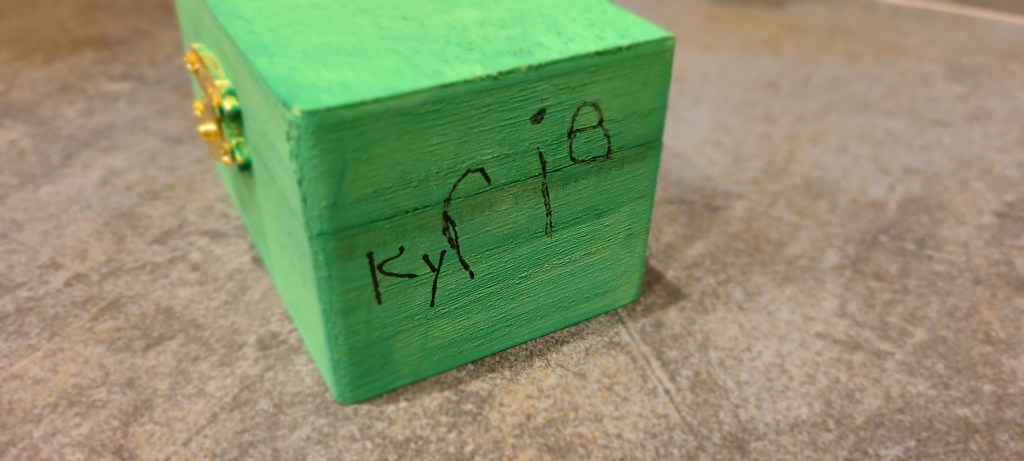
I found the keepsake boxes for this project at Dollar Tree, they were the perfect size. What I love about this craft is the kids were able to do pretty much everything themselves
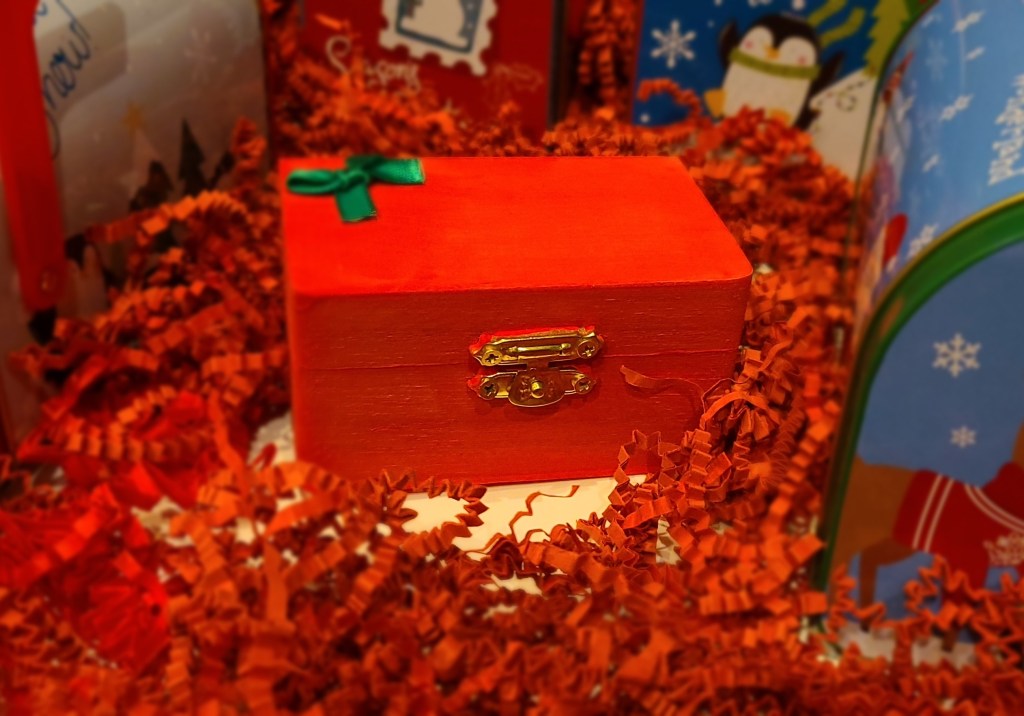
They used tempera paint to paint half the boxes green and half the boxes red. I added a bow with a dab of hot glue once the paint dried
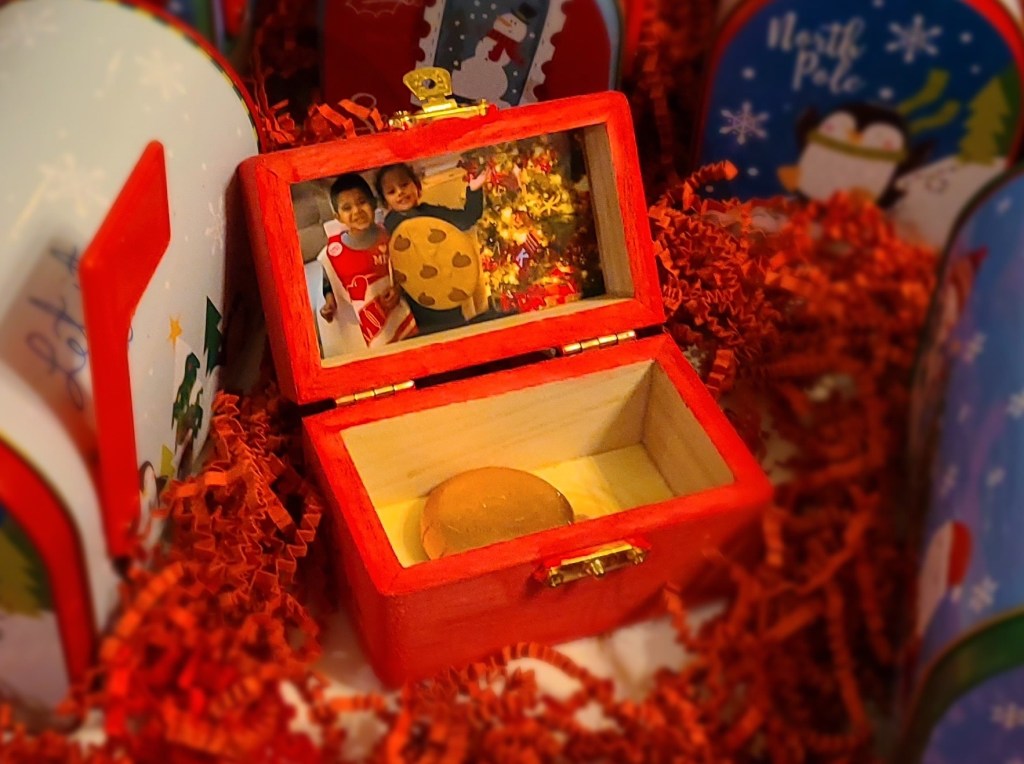
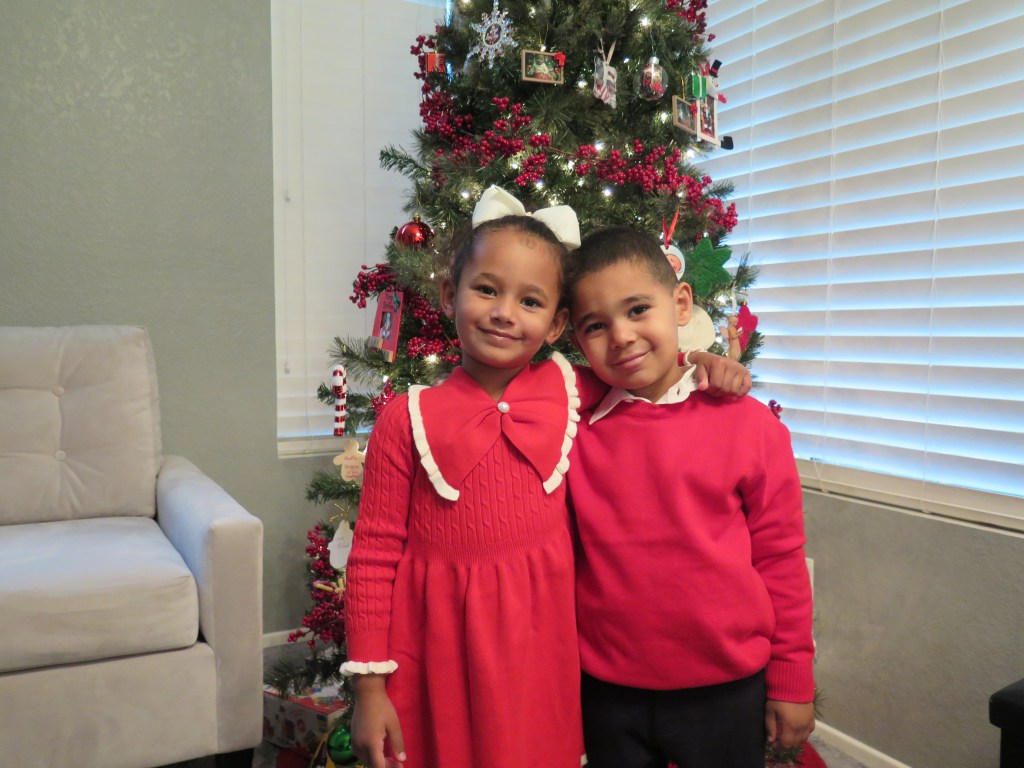
I printed a set of wallet sized photos the kids glued to the inside lid. We added a little chocolate inside each box and for a finishing touch the kids wrote their name on either side of each box with a thin marker pen
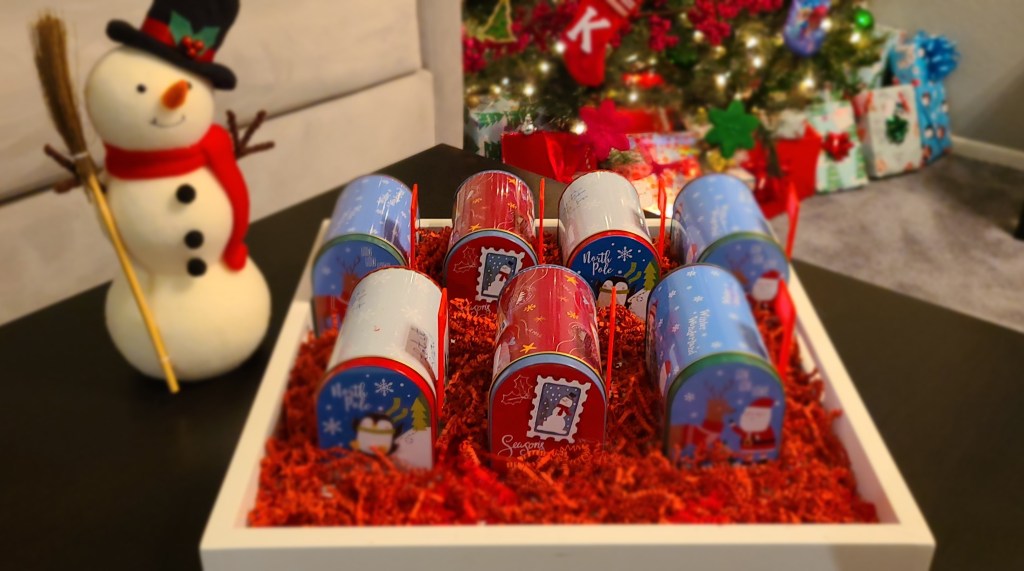
We packaged the gifts in these cute mailboxes from, can you guess where? Ding, ding! Dollar Tree 🙂
Hope you have fun making these crafts! Merry Christmas!!

Leave a comment